Raspberry Pi を新しくしてからメトリクスの可視化を行っていなかったので Grafana Cloud で見れるようにセットアップしようと Grafana のサイトを見ていたら Alloy というものの存在を知ったので試してみる。
Grafana Alloy is a vendor-neutral distribution of the OpenTelemetry (OTel) Collector. Alloy uniquely combines the very best OSS observability signals in the community.
Alloy はベーダーニュートラルな OpenTelemetry Collector で、なんか最高らしいです 😊😊

Prometheus のメトリクス収集と Remote Write もできるし、node_exporter をはじめとする数多くの prometheus exporter も内包しているし、Log 収集して Grafana Loki にも送れる。もちろん OpenTelemetry Collector として Trace も処理する。Windows にも対応。 今回は DietPi (Linux) でそれ自身の Metrics 送信を試します。
Install
deb や rpm もありますし、Windows 用の exe もあります、 mac も Homebrew でインストール可能です。 今回のインストール先は DietPi なので ARM 用の Linux バイナリをダウンロードして配置することにします。
GitHub の release ページからダウンロードできます。 最新の v1.0.0 をインストールします。
| |
Systemd 設定
https://grafana.com/docs/alloy/latest/get-started/run/binary/ に Systemd の Unit ファイルのサンプルもあるのでほぼそれのコピペで OK
実行ユーザー作成
| |
systemd service 設定
| |
ラズパイで SD カードに無駄に書き込みしたくないので storage.path は /tmp にしました。
引数設定
| |
Token 発行と config ファイル設定
grafana.net のサイトで Connections → Collector → Alloy を開くと Token の作成フォームがあります
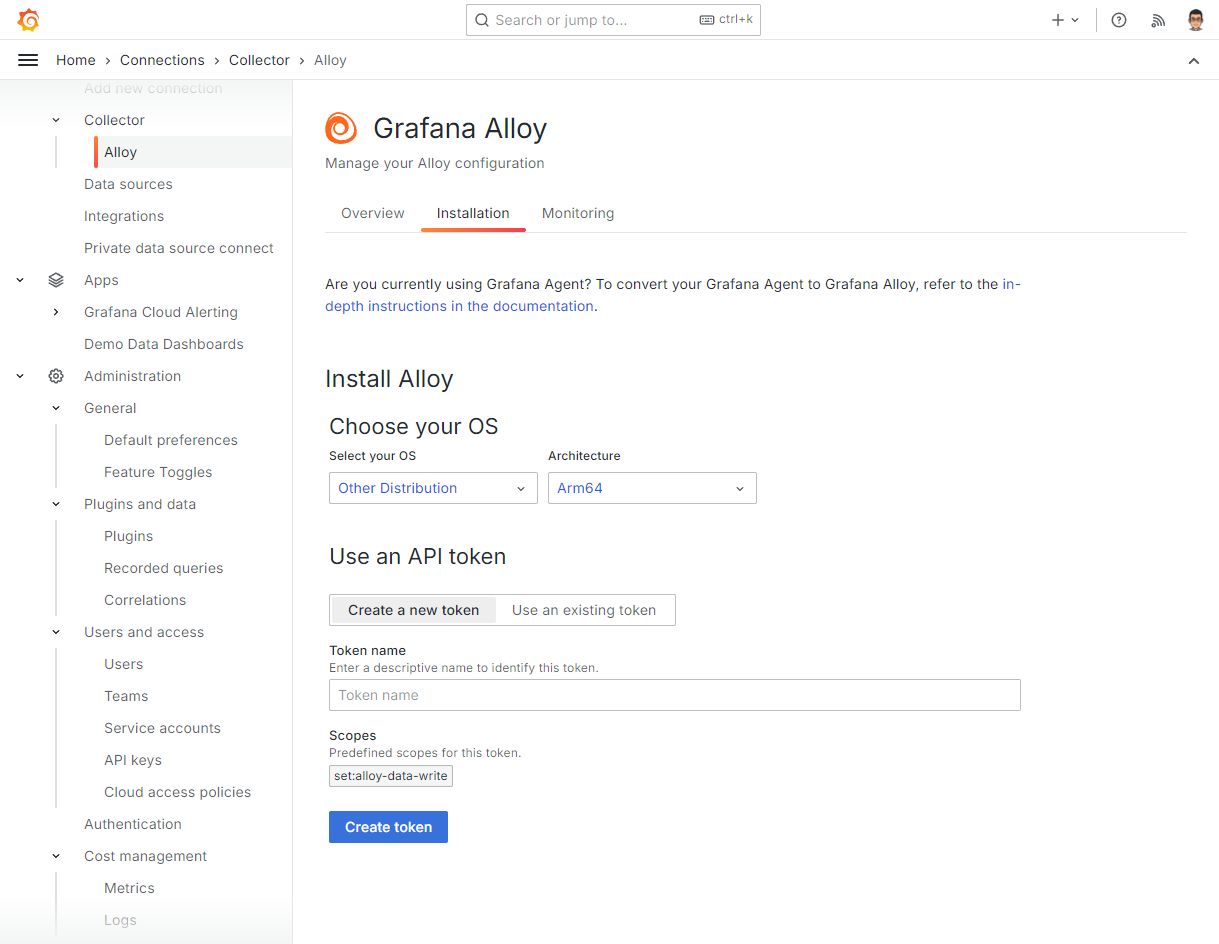
ここで token の作成を行うと次のような変数を指定して
| |
Cloud Storage にある shell script を実行するスニペットが表示されるのでコピペで実行します
| |
すると、カレントディレクトリに alloy のバイナリがダウンロードされて config.alloy ファイルが作られて alloy が実行されます。
config.alloy も Cloud Storage からダウンロードしたものに先の変数を展開したもので、Alloy の内部メトリクスを Prometheus の remote write で送信する設定になっています。
メトリクスが遅れていることを確認するボタンがあるのでそれをクリックして動作確認ができたら Ctrl-C で alloy を停止して config.alloy 以外を削除します。
config.alloy は Systemd の設定で指定した /etc/alloy/config.alloy に移動させて、追加の設定を行います。
node_exporter 設定
Alloy には node_exporter も内包されているので alloy を実行しているホストに別途 node_exporter をセットアップする必要はありません。
prometheus.exporter.unix で scrape できます。
次の設定は Linux Server integration for Grafana Cloud にある例です。 node_exporter や prometheus を使ったことがあればなじみのある設定項目かと思います。
discovery.relabel "integrations_node_exporter" {
  targets = prometheus.exporter.unix.integrations_node_exporter.targets

  rule {
    target_label = "instance"
    replacement  = constants.hostname
  }

  rule {
    target_label = "job"
    replacement = "integrations/node_exporter"
  }
}

prometheus.exporter.unix "integrations_node_exporter" {
  disable_collectors = ["ipvs", "btrfs", "infiniband", "xfs", "zfs"]

  filesystem {
    fs_types_exclude     = "^(autofs|binfmt_misc|bpf|cgroup2?|configfs|debugfs|devpts|devtmpfs|tmpfs|fusectl|hugetlbfs|iso9660|mqueue|nsfs|overlay|proc|procfs|pstore|rpc_pipefs|securityfs|selinuxfs|squashfs|sysfs|tracefs)$"
    mount_points_exclude = "^/(dev|proc|run/credentials/.+|sys|var/lib/docker/.+)($|/)"
    mount_timeout        = "5s"
  }

  netclass {
    ignored_devices = "^(veth.*|cali.*|[a-f0-9]{15})$"
  }

  netdev {
    device_exclude = "^(veth.*|cali.*|[a-f0-9]{15})$"
  }
}

prometheus.scrape "integrations_node_exporter" {
  targets    = discovery.relabel.integrations_node_exporter.output
  forward_to = [prometheus.relabel.integrations_node_exporter.receiver]
}

prometheus.relabel "integrations_node_exporter" {
  forward_to = [prometheus.remote_write.metrics_service.receiver]

  rule {
    source_labels = ["__name__"]
    regex         = "node_scrape_collector_.+"
    action        = "drop"
  }
}
metrics の送信先設定ですが、install script では username, password がべた書きされますが、次のようにして環境変数から読み込んだり、変更を watch する別ファイルの値を変更を使うことができます。
local.file "password" {
  filename = "/etc/alloy/alloy.password"
  is_secret = true
  poll_frequency = "1s"
}

prometheus.remote_write "metrics_service" {
  endpoint {
    url = "https://prometheus-us-central1.grafana.net/api/prom/push"

    basic_auth {
      username = env("PROM_USERNAME")
      password = local.file.password.content
    }
  }
}
その他
今回使ってないけどなんでもそろってる。
Autodiscovery
AWS(EC2、lightsail), Azure, Google Cloud や DigitalOcean、linode の compute instance の自動ディスカバリも可能ですし、Consul や DNS、nomad、Openstack などなどでのディスカバリも可能です。 Prometheus も内包してる感じなので prometheus と同じように動的に変わる scrape 対象に問題なく対応可能です。
Kubernetes にも対応していますし、Prometheus Operator の ServiceMonitor、PodMonitor にも対応しています。
送信先
Grafana Cloud でしか使えないわけではなく、metrics は自前の Prometheus にも送信可能ですし、AWS や Azure の Managed Service for Prometheus への送信も可能っぽいです。 Loki の managed service は3大クラウドにはないと思うのでログの送信は Grafana Cloud だけかな。
OpenTelemetry 関連
receiver, processor, exporter など一通りそろってそうですが、まだ使ってないのでわからない。
感想
なんでもかんでも内包してるのが良いとは一概に言えない気もしますが、しばらくおうちのラズパイで使ってみます。


 amazon.co.jp