minikubeでKubernetesのチュートリアルをやってみた というお役立ち記事をみたので前回 (minikube でローカルでのテスト用 Kubernetes を構築)の続きをやってみる
新しいバージョンが出てたのでまずは更新
There is a newer version of minikube available (v0.14.0).  Download it here:
https://github.com/kubernetes/minikube/releases/tag/v0.14.0
To disable this notification, add WantUpdateNotification: False to the json config file at /home/ytera/.minikube/config
(you may have to create the file config.json in this folder if you have no previous configuration)
$ curl -Lo minikube https://storage.googleapis.com/minikube/releases/v0.14.0/minikube-linux-amd64 \
&& chmod +x minikube \
&& sudo mv minikube /usr/local/bin/$ minikube version
minikube version: v0.14.0$ minikube get-k8s-versions
The following Kubernetes versions are available:
- v1.5.1
- v1.4.5
- v1.4.3
- v1.4.2
- v1.4.1
- v1.4.0
- v1.3.7
- v1.3.6
- v1.3.5
- v1.3.4
- v1.3.3
- v1.3.0最新バージョンが 1.5.1 になってます。
$ minikube start
Starting local Kubernetes cluster...
Kubectl is now configured to use the cluster.
$ minikube status
minikubeVM: Running
localkube: Running
やっぱ楽ちん
$ minikube dashboard
Opening kubernetes dashboard in default browser...
既存のブラウザ セッションに新しいウィンドウが作成されました。
kubectl も更新
$ curl -Lo kubectl http://storage.googleapis.com/kubernetes-release/release/v1.5.1/bin/linux/amd64/kubectl \
  && chmod +x kubectl \
  && sudo mv kubectl /usr/local/bin/
$ kubectl cluster-info
Kubernetes master is running at https://192.168.99.100:8443
KubeDNS is running at https://192.168.99.100:8443/api/v1/proxy/namespaces/kube-system/services/kube-dns
kubernetes-dashboard is running at https://192.168.99.100:8443/api/v1/proxy/namespaces/kube-system/services/kubernetes-dashboard
To further debug and diagnose cluster problems, use 'kubectl cluster-info dump'.$ kubectl get nodes
NAME STATUS AGE
minikube Ready 4mアプリのデプロイ
kubernets-bootcamp という名前の deployment を作成 image と port を指定するだけなのですね。昔は pod 用の YAML を用意する必要があったきがするけど。
$ kubectl run kubernetes-bootcamp --image=docker.io/jocatalin/kubernetes-bootcamp:v1 --port=8080
deployment "kubernetes-bootcamp" created
$ kubectl get deployments
NAME DESIRED CURRENT UP-TO-DATE AVAILABLE AGE
kubernetes-bootcamp 1 1 1 1 37sDashboard ではこんな感じ
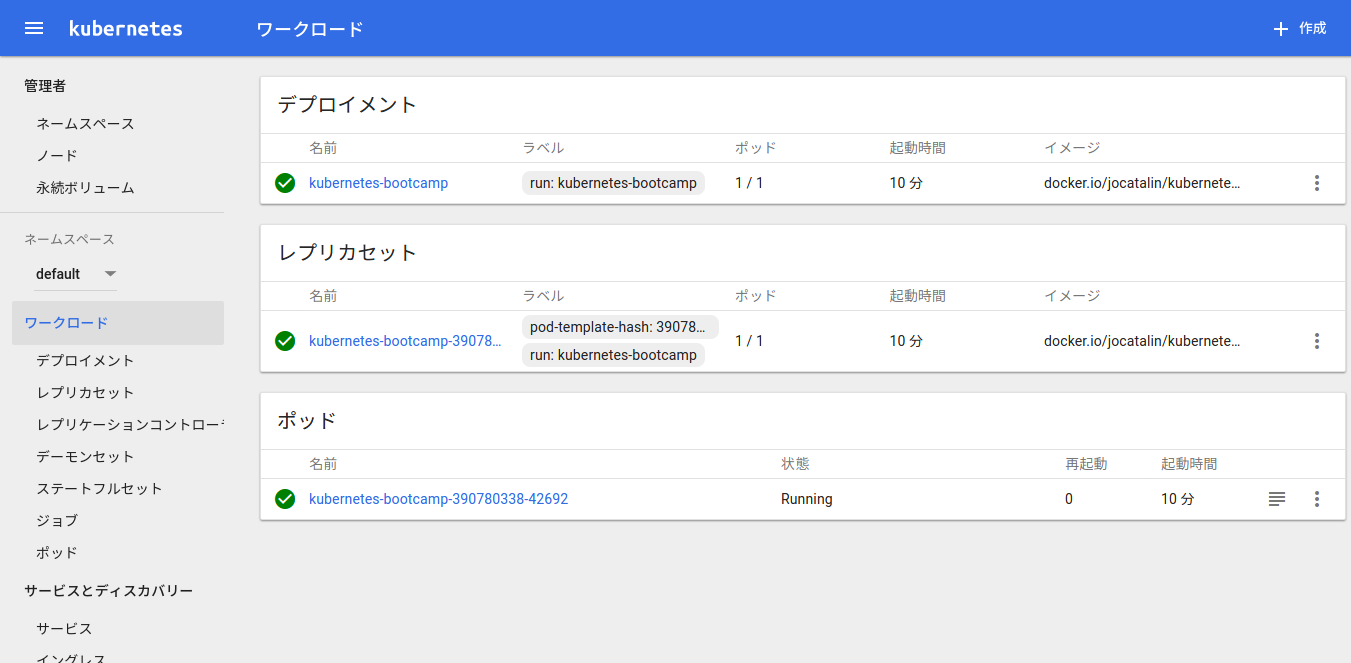
Workload
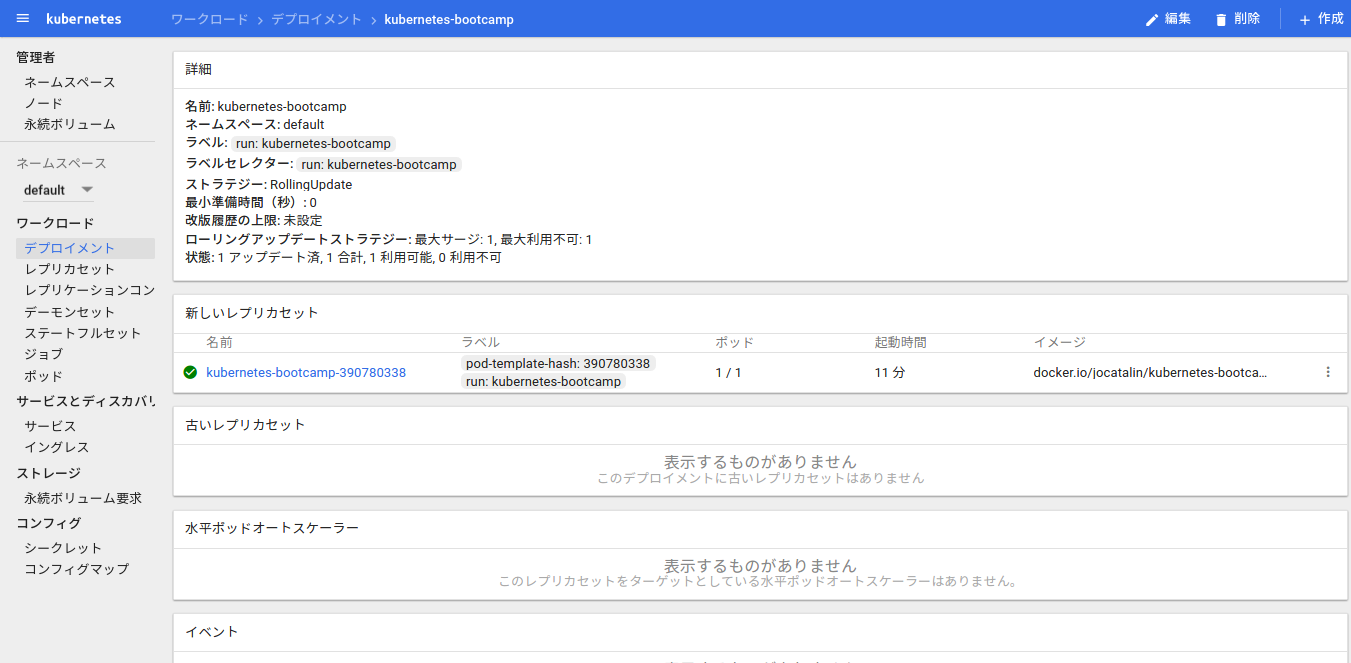
deployment
アプリへのアクセス
kubectl run だけでは kubernetes 内に閉じているので外部から直接はアクセスできません。
kubectl proxy と実行することで kubernetes 内へアクセスするための proxy サーバーが起動します。
まずは POD 名を取得 何度も使うので環境変数に入れておきます
$ export POD_NAME=$(kubectl get pods -o go-template --template '{{range .items}}{{.metadata.name}}{{"\n"}}{{end}}')
$ echo Name of the Pod: $POD_NAME
Name of the Pod: kubernetes-bootcamp-390780338-42692
proxy の起動(終了までプロンプトが戻らないのでバックグラウンドで)
$ kubectl proxy &
[1] 9009
Starting to serve on 127.0.0.1:8001
次のような URL で proxy 経由で POD のアプリにアクセスできます
$ curl http://localhost:8001/api/v1/proxy/namespaces/default/pods/$POD_NAME/
Hello Kubernetes bootcamp! | Running on: kubernetes-bootcamp-390780338-42692 | v=1
default という namespace の kubernetes-bootcamp-390780338-42692 という pod にアクセスしてます。 でもこれは動作確認に使う程度かな?
Pod を Dashboard で見てみるとこんな感じ
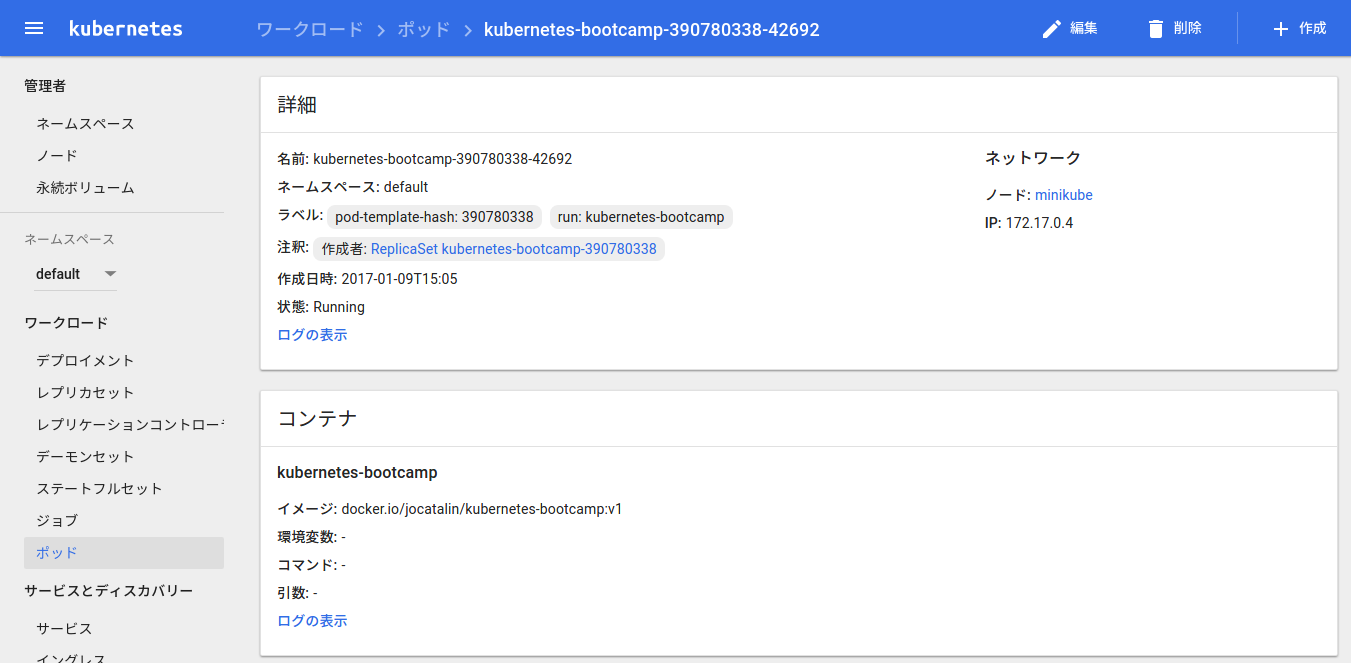
Pod
Pod の情報確認
$ kubectl get pods
NAME                                  READY     STATUS    RESTARTS   AGE
kubernetes-bootcamp-390780338-42692   1/1       Running   0          24m
$ kubectl describe pods
Name: kubernetes-bootcamp-390780338-42692
Namespace: default
Node: minikube/192.168.99.100
Start Time: Tue, 10 Jan 2017 00:05:32 +0900
Labels: pod-template-hash=390780338
run=kubernetes-bootcamp
Status: Running
IP: 172.17.0.4
Controllers: ReplicaSet/kubernetes-bootcamp-390780338
Containers:
kubernetes-bootcamp:
Container ID: docker://a503a23e393ffa15ea98c0f0ef28e87739b6b6f55dd0c2629fe1b50dd9b5b213
Image: docker.io/jocatalin/kubernetes-bootcamp:v1
Image ID: docker://sha256:8fafd8af70e9aa7c3ab40222ca4fd58050cf3e49cb14a4e7c0f460cd4f78e9fe
Port: 8080/TCP
State: Running
Started: Tue, 10 Jan 2017 00:06:07 +0900
Ready: True
Restart Count: 0
Volume Mounts:
/var/run/secrets/kubernetes.io/serviceaccount from default-token-t611k (ro)
Environment Variables: Conditions:
Type Status
Initialized True
Ready True
PodScheduled True
Volumes:
default-token-t611k:
Type: Secret (a volume populated by a Secret)
SecretName: default-token-t611k
QoS Class: BestEffort
Tolerations: Events:
FirstSeen LastSeen Count From SubObjectPath Type Reason Message
--------- -------- ----- ---- ------------- -------- ------ -------
25m 25m 1 {default-scheduler } Normal Scheduled Successfully assigned kubernetes-bootcamp-390780338-42692 to minikube
25m 25m 1 {kubelet minikube} spec.containers{kubernetes-bootcamp} Normal Pulling pulling image "docker.io/jocatalin/kubernetes-bootcamp:v1"
24m 24m 1 {kubelet minikube} spec.containers{kubernetes-bootcamp} Normal Pulled Successfully pulled image "docker.io/jocatalin/kubernetes-bootcamp:v1"
24m 24m 1 {kubelet minikube} spec.containers{kubernetes-bootcamp} Normal Created Created container with docker id a503a23e393f; Security:[seccomp=unconfined]
24m 24m 1 {kubelet minikube} spec.containers{kubernetes-bootcamp} Normal Started Started container with docker id a503a23e393f ログの確認 さっき proxy 経由でアクセスしたものが表示されてます
$ kubectl logs $POD_NAME
Kubernetes Bootcamp App Started At: 2017-01-09T15:06:07.713Z | Running On:  kubernetes-bootcamp-390780338-42692

Running On: kubernetes-bootcamp-390780338-42692 | Total Requests: 1 | App Uptime: 461.145 seconds | Log Time: 2017-01-09T15:13:48.859Z
docker exec 的なやつ
kubectl exec で docker exec 的なことができます コンテナ内で env コマンドを実行
$ kubectl exec $POD_NAME env
PATH=/usr/local/sbin:/usr/local/bin:/usr/sbin:/usr/bin:/sbin:/bin
HOSTNAME=kubernetes-bootcamp-390780338-42692
KUBERNETES_PORT_443_TCP_ADDR=10.0.0.1
KUBERNETES_SERVICE_HOST=10.0.0.1
KUBERNETES_SERVICE_PORT=443
KUBERNETES_SERVICE_PORT_HTTPS=443
KUBERNETES_PORT=tcp://10.0.0.1:443
KUBERNETES_PORT_443_TCP=tcp://10.0.0.1:443
KUBERNETES_PORT_443_TCP_PROTO=tcp
KUBERNETES_PORT_443_TCP_PORT=443
NPM_CONFIG_LOGLEVEL=info
NODE_VERSION=6.3.1
HOME=/root
コンテナ内で bash を実行し、アプリ(nodejs)のファイルを覗いてみる そして curl で localhost:8080 にアクセスしてみる
$ kubectl exec -ti $POD_NAME bash
root@kubernetes-bootcamp-390780338-42692:/# head server.js
var http = require('http');
var requests=0;
var podname= process.env.HOSTNAME;
var startTime;
var host;
var handleRequest = function(request, response) {
  response.setHeader('Content-Type', 'text/plain');
  response.writeHead(200);
  response.write("Hello Kubernetes bootcamp! | Running on: ");
  response.write(host);
root@kubernetes-bootcamp-390780338-42692:/# curl localhost:8080
Hello Kubernetes bootcamp! | Running on: kubernetes-bootcamp-390780338-42692 | v=1
root@kubernetes-bootcamp-390780338-42692:/# exit
exit
いまコンテナ内からアクセスしたログも kubectl logs で確認できます
$ kubectl logs $POD_NAME
Kubernetes Bootcamp App Started At: 2017-01-09T15:06:07.713Z | Running On:  kubernetes-bootcamp-390780338-42692

Running On: kubernetes-bootcamp-390780338-42692 | Total Requests: 1 | App Uptime: 461.145 seconds | Log Time: 2017-01-09T15:13:48.859Z
Running On: kubernetes-bootcamp-390780338-42692 | Total Requests: 2 | App Uptime: 1982.054 seconds | Log Time: 2017-01-09T15:39:09.767Z
Service を使って外部からアクセスする
まずは今の状態で service を確認してみる
$ kubectl get services
NAME         CLUSTER-IP   EXTERNAL-IP   PORT(S)   AGE
kubernetes   10.0.0.1     443/TCP   46m
$ kubectl describe services/kubernetes
Name: kubernetes
Namespace: default
Labels: component=apiserver
provider=kubernetes
Selector: Type: ClusterIP
IP: 10.0.0.1
Port: https 443/TCP
Endpoints: 10.0.2.15:8443
Session Affinity: ClientIP
No events. 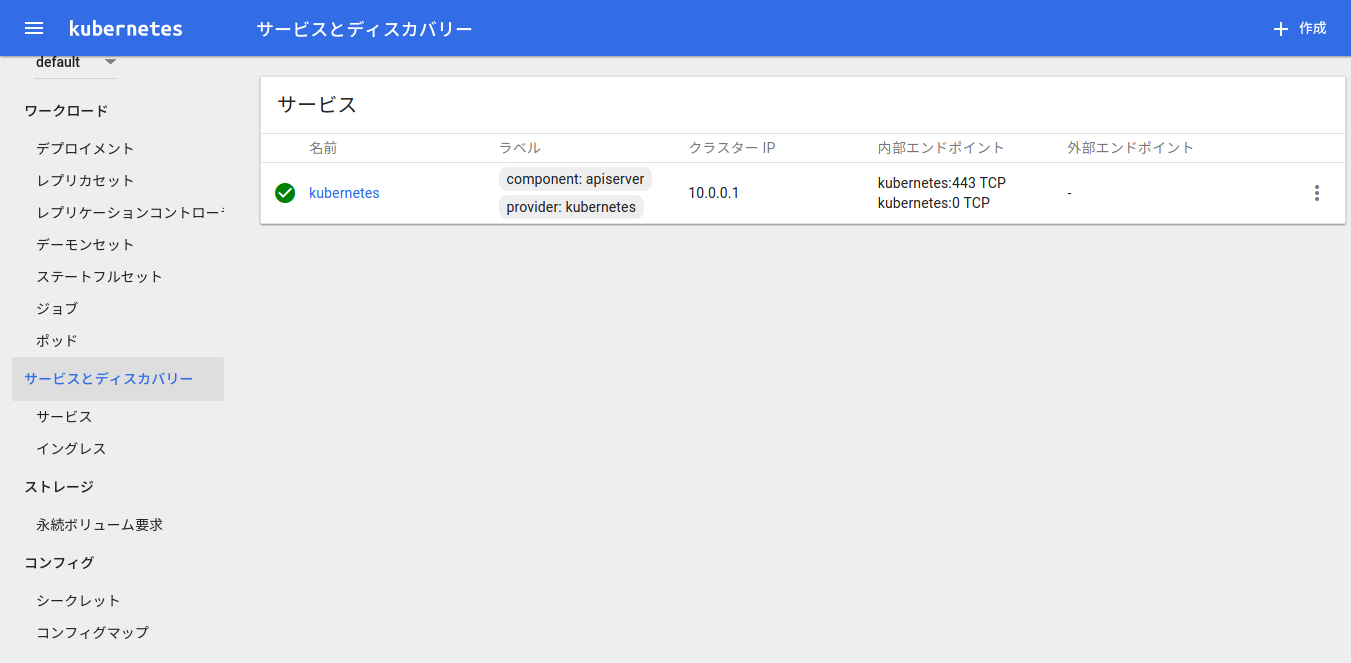
Service
kubernetes-bootcamp deployment に対して service を作成する
--type="NodePort" とすることで node (minikube) のIPアドレスで先ほどの pod (deployment) の port 8080 にアクセスできるようになります
$ kubectl expose deployment/kubernetes-bootcamp --type="NodePort" --port 8080
service "kubernetes-bootcamp" exposed
kubernetes-bootcamp という service が追加されました
$ kubectl get services
NAME                  CLUSTER-IP   EXTERNAL-IP   PORT(S)          AGE
kubernetes            10.0.0.1     443/TCP          52m
kubernetes-bootcamp   10.0.0.235   8080:31168/TCP   2m
describe で node のどの port で listen しているか確認できます。
$ kubectl describe services/kubernetes-bootcamp
Name:			kubernetes-bootcamp
Namespace:		default
Labels:			run=kubernetes-bootcamp
Selector:		run=kubernetes-bootcamp
Type:			NodePort
IP:			10.0.0.235
Port:			 8080/TCP
NodePort:		 31168/TCP
Endpoints:		172.17.0.4:8080
Session Affinity:	None
No events. 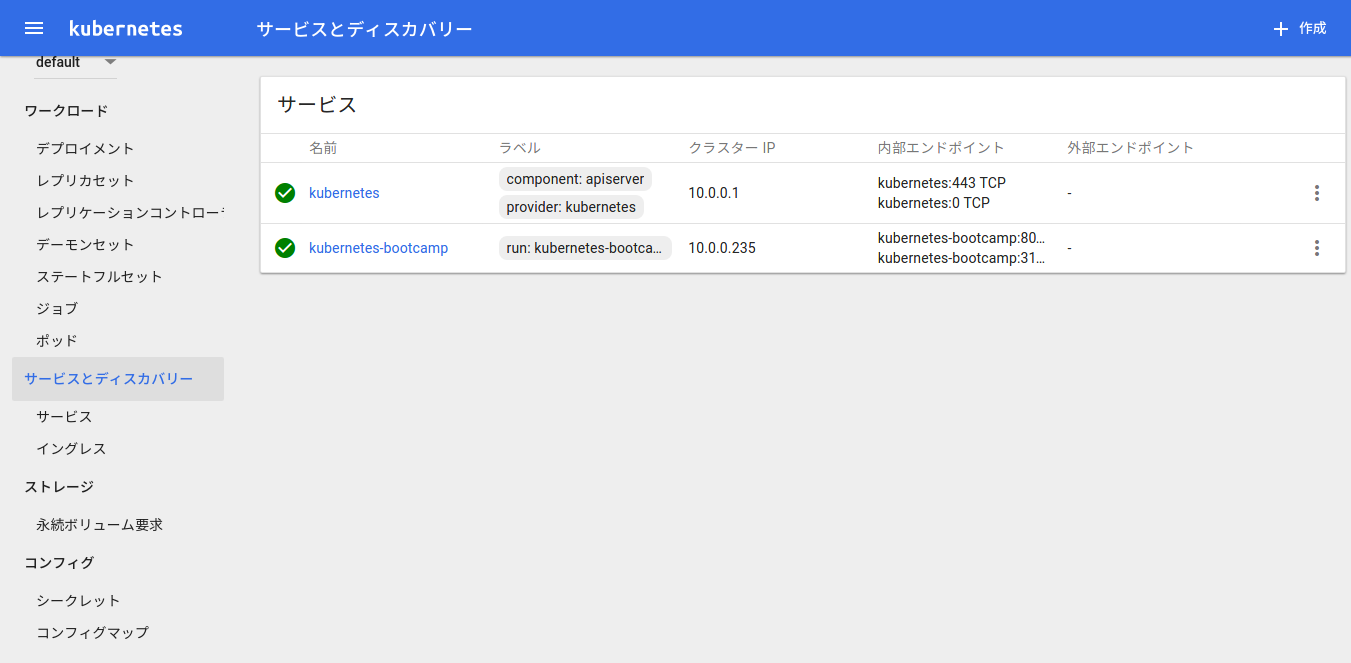
Service (2)
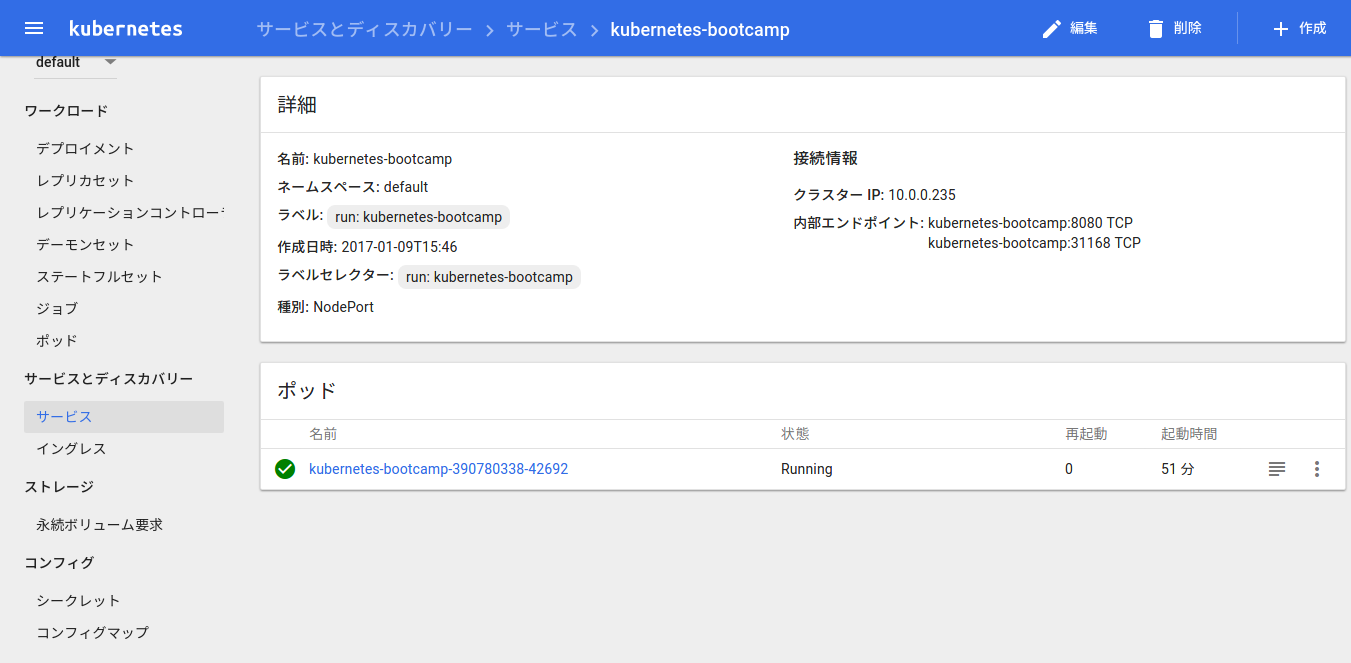
Service (3)
後で使うため node の port を環境変数にいれておきます
$ export NODE_PORT=$(kubectl get services/kubernetes-bootcamp -o go-template='{{(index .spec.ports 0).nodePort}}')
$ echo NODE_PORT=$NODE_PORT
NODE_PORT=31168
node は minikube なのでその IP address を確認します
$ minikube ip
192.168.99.100
node の IP address と service port がわかったところで curl で外からアクセスしてみます
$ curl $(minikube ip):$NODE_PORT
Hello Kubernetes bootcamp! | Running on: kubernetes-bootcamp-390780338-42692 | v=1
アクセスできました。
minikube service コマンド (2017/1/23追記)
minikube service というコマンドを教えてもらいました。
@yteraoka ブログ上でコメントできるところがなかったのでこちらで失礼します。https://t.co/H0AoFVY5iI
— みんちゃん🍀 (@kkam0907) January 18, 2017
minikube service my-nginx --url でもアプリアクセスできるipが参照できました。
minikube service list コマンドで service の URL が簡単に確認できます。
$ minikube service list
|-------------|----------------------|-----------------------------|
|  NAMESPACE  |         NAME         |             URL             |
|-------------|----------------------|-----------------------------|
| default     | kubernetes           | No node port                |
| default     | kubernetes-bootcamp  | http://192.168.99.100:30628 |
| kube-system | kube-dns             | No node port                |
| kube-system | kubernetes-dashboard | http://192.168.99.100:30000 |
|-------------|----------------------|-----------------------------|
さらに minikube service kubernetes-bootcamp と service 名を指定すればブラウザでその URL を開いてくれます。minikube dashboard と同じ感じです。
ブラウザで開いてもらわなくて良い場合は --url をつけるとこう表示されます。
$ minikube service kubernetes-bootcamp --url
http://192.168.99.100:30628
ラベル
kubernetes の各リソースにはラベルがついています。
今回作成した deployment には run=kubernetes-bootcamp というラベルがついていることが describe で確認できます。
Dashboard からポチポチと各リソースを確認してみてもわかります
$ kubectl describe deployment
Name:			kubernetes-bootcamp
Namespace:		default
CreationTimestamp:	Tue, 10 Jan 2017 00:05:32 +0900
Labels:			run=kubernetes-bootcamp
Selector:		run=kubernetes-bootcamp
Replicas:		1 updated | 1 total | 1 available | 0 unavailable
StrategyType:		RollingUpdate
MinReadySeconds:	0
RollingUpdateStrategy:	1 max unavailable, 1 max surge
Conditions:
  Type		Status	Reason
  ----		------	------
  Available 	True	MinimumReplicasAvailable
OldReplicaSets:	 NewReplicaSet:	kubernetes-bootcamp-390780338 (1/1 replicas created)
Events:
  FirstSeen	LastSeen	Count	From				SubObjectPath	Type		Reason			Message
  ---------	--------	-----	----				-------------	--------	------			-------
  55m		55m		1	{deployment-controller }		Normal		ScalingReplicaSet	Scaled up replica set kubernetes-bootcamp-390780338 to 1
-l パラメーターでラベルを使ったクエリが行えます
$ kubectl get pods -l run=kubernetes-bootcamp
NAME                                  READY     STATUS    RESTARTS   AGE
kubernetes-bootcamp-390780338-42692   1/1       Running   0          58m
Pod は1つしか作ってないので未指定の場合と変わらないけど services の方はマッチするもだけが表示されてることがわかります
$ kubectl get services -l run=kubernetes-bootcamp
NAME                  CLUSTER-IP   EXTERNAL-IP   PORT(S)          AGE
kubernetes-bootcamp   10.0.0.235   8080:31168/TCP   19m
kubectl label コマンドで任意のラベルを追加することもできます
$ kubectl describe pods $POD_NAME
Name:		kubernetes-bootcamp-390780338-42692
Namespace:	default
Node:		minikube/192.168.99.100
Start Time:	Tue, 10 Jan 2017 00:05:32 +0900
Labels:		app=v1
		pod-template-hash=390780338
		run=kubernetes-bootcamp
Status:		Running
IP:		172.17.0.4
Controllers:	ReplicaSet/kubernetes-bootcamp-390780338
...
$ kubectl get pods -l app=v1
NAME READY STATUS RESTARTS AGE
kubernetes-bootcamp-390780338-42692 1/1 Running 0 1hサービスの削除
$ kubectl delete service -l run=kubernetes-bootcamp
service "kubernetes-bootcamp" deleted
$ kubectl get services
NAME CLUSTER-IP EXTERNAL-IP PORT(S) AGE
kubernetes 10.0.0.1 443/TCP 1h 削除されました。 先ほどの NodePort にももうアクセスできません。
$ curl $(minikube ip):$NODE_PORT
curl: (7) Failed to connect to 192.168.99.100 port 31168: Connection refused
その3 に続く

